
If you want better music moments while on the road, learn how to install an amp in a car with factory radio.
To do so, dismount your stereo to locate the speaker wires, which you will connect to the aftermarket amp placed in the trunk. The amplifier will also be connected to a power source and ground wiring.
It might be intimidating because of the wiring task, but once you get the rhythm (pun intended), you’ll have that good sound soon.
Contents
Steps to Install an Amp in a Car With Factory Radio
1. Choosing the right amp for your car
There are three things to consider when adding an amp to a factory stereo: compatibility, channels, and power.
- Compatibility: Most factory stereos don’t have preamp outputs, so you’ll need a line output converter. However, there are modern amplifiers with speaker-level inputs, though such units are pricier.
- Channels: The number of the amp’s channels depends on the number of speakers. The ratio is 1:1 (one channel for each speaker) unless when using a subwoofer – a speaker that delivers low-pitched audio frequencies. Hence, if you have two speakers, you need a two-channel amplifier.
Those with two to six channels are recommended as they give you spare channels when you upgrade your unit, like adding a subwoofer. So a subwoofer is an optional consideration when choosing an amp.
- Power: Since you’re upgrading the stereo through the amp, it means you want a superb sound experience.
As such, don’t underpower your unit. To do so, get the speakers’ root mean square (RMS), which you will use as a guide when choosing the amp that will work best when linking it to the factory head unit.
Determine the speakers’ RMS (indicated in the packaging/manual), and the amp’s wattage per channel should not exceed the RMS.
2. What to prepare
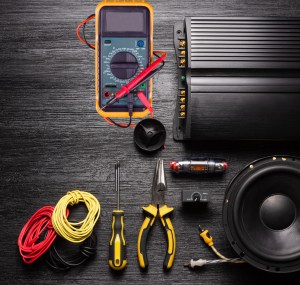
- Amplifier kit
- Cutter
- Wire stripper
- Soldering kit
- Heat shrink tubing
- Pair of pliers
- Trim removal tool
- Stereo removal tool (optional)
- Nine-volt battery (optional)
- Multimeter (optional)
- Screwdriver or wrench
- Line output converter
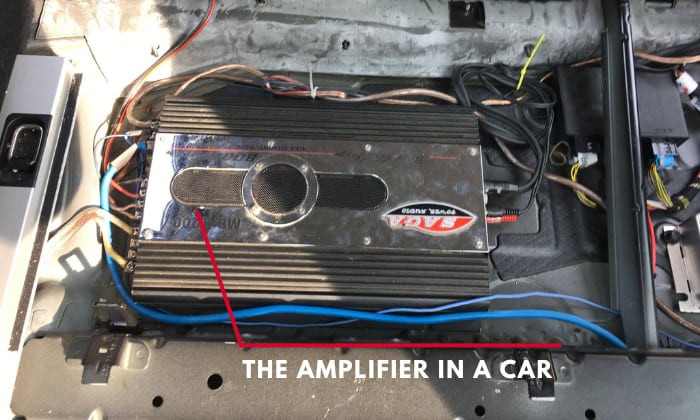
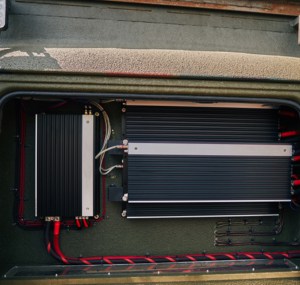
Step 1: Position the amplifier

Most people install amplifiers in the trunk because it’s spacious. Ensure that the amp’s position is stable so it won’t displace during travel.
Step 2: Dismount the radio
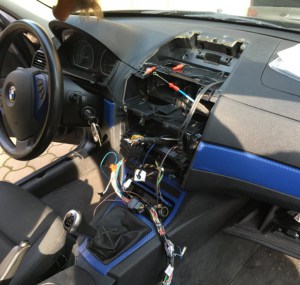
Dismount the radio from the panel with a stereo removal tool. Alternatively, use screwdrivers, wrenches, panel tools, and the like. Locate the holes and penetrate it with the tools. Afterwards, pull it with the help of a pair of pliers until a portion of it protrudes.
You can also remove a radio with knives. Insert the sharp metals on each side of the mounting bracket. Grip the knives and pull the radio slowly until a part of it protrudes, which you can pull out with your fingers.
Don’t pull the stereo with too much force, as it might mangle the cables behind it.
Step 3: Work the wires
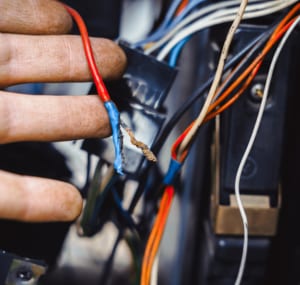
Before everything else, you must ensure you have a working wire so your tinkering won’t end up as a trial-and-error saga.
After dismounting the radio, you can then tinker with its wires. Identify the rear speaker cables and their negative/positive wires.
- If you still have the wiring diagram, it’s your best pal.
- Another way to determine the positive or negative wire is by its coloring. In some cases, both have the same colors, but the latter has a stripe of a different hue.
- If you have a nine-volt battery or multitester, you can also use them to test the polarity. Just link the wire to its appropriate polarity in the battery or use the test prod for the multimeter.
Afterward, using a wire stripper or cutter, cut a portion of the cable to reveal the wires.
You can again determine the polarity by tapping the speaker wire into the exposed radio wiring. The speaker will deliver bursts of sound (assuming it’s turned on) when the negative/positive wires are matched.
If you are certain about the polarity, link the speaker wire to the exposed wire and secure it with electrical tape. You also have the option to solder it for a tighter linkage and seal it with a heat shrink tubing.
Step 4: Connect amp and radio
When the wiring is fixed, you can connect them to the line output converter. As its name suggests, the converter converts the speaker’s high voltage to a Radio Corporation of America (RCA)-level output compatible with the amp.
The converter serves as the link between the radio and the amp. The RCA cables of the amp are connected to it, too — so there are wires on both ends of the device.
However, not all amps require converters, like those with speaker-level inputs and some powered subwoofers.
For the cable setup, one way to hide it is by placing it under the side panel by the driver’s side, running it from the stereo to the amp. After all, you don’t want the cable snaking on the floor.
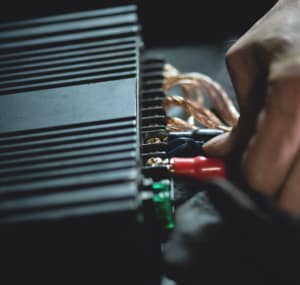
Step 5: Connect the amp to the power source and ground wiring
If you have a four-channel amplifier, its remote wire is compatible with a 12-volt power source – like the lighter socket of the car. It is an option to power up the unit, assuming it’s yet to be connected to any fuse box or the battery terminal.
Afterward, work with the amplifier’s ground wire, which ensures a smooth electrical circuit. It’s a screw or bolt, usually in the trunk connected to the chassis. If the vehicle doesn’t have this thing, put one by drilling a hole.
Step 6: Test the new radio setup

Now that you have wired the amp to the stock radio, it’s time to test it. If an issue props up, check the wiring setup again or the grounding cable if it’s properly linked to the amp.
Before covering the cables and mounting the radio back to the dashboard, test the connection of the stock radio to the amp so you don’t continually assemble the things you removed.
The Importance of Installing an Amp in a Car With Factory Radio

Why bother hooking up an amp to the factory radio? The answer is for a better sound experience, like good bass. For starters, the sound will be louder with little to no distortion. It is possible because of the increased volume made possible by the amp.
Also, if you plan to upgrade the stereo, adding an amplifier is an option to power up its speakers. After all, you’re upgrading, so you might as well go all out. Furthermore, if you’re adding a subwoofer, an amp is a good complement.
To summarize, an amp will amp up your stereo experience.
When You Should or Shouldn’t Add an Amplifier to Your Factory System

Add an amp if you have an upgraded aftermarket speaker so its power doesn’t get wasted. Factory speakers are low-powered, much so that the combination of noise from the air conditioner and the outdoors can flood its sounds.
Never hook up an amp and a sub if they are incompatible, as it would defeat the purpose of amping up your setup. An amplifier is not required if you’re content with the factory unit.
Common Problems and How to Fix Them
1. No output from the amp:

After installing a subwoofer and an amp and there’s no output even when the radio is working, check the power wiring and ground cabling. When the amp is properly connected to the stereo, it turns on when the latter is turned on.
Some amps have a “Protect Mode,” which protects it from damage in case any other part of the sound system is compromised. If its light is turned on, check the cable setup, stereo, or subwoofer for possible issues, which needs correction before activating the amp again.
2. Sound distortion:

If the sound is distorted, the amp might be underpowered, so you must choose one that’s compatible with the speaker’s RMS. If this is the case, consider upgrading the amp or seeking the help of a professional.
If there’s humming in the speaker, it’s possibly caused by interference, which you can remedy by adjusting the cables – from the speaker wires to the ground cable.
Furthermore, if you think the bass is weak, check the equalizer settings and adjust it accordingly, which usually solves the issue. Otherwise, reposition the amp or subwoofer for optimum performance.
All in all, when something’s off in your sound system, it’s safe to think that the woe is caused by wiring. As such, regular maintenance is needed so you protect your setup from further issues.
Helpful Tips

How long does it take to install an amp in a car?
Installing an amp is intimidating because it also involves dismounting the radio and placing the cables. Allot three to four hours for the installation.
Will installing an amp in my car void my warranty?
Adding an aftermarket amp, subwoofer, or stereo will not void the vehicle’s warranty. In fact, a law, the Magnuson–Moss Warranty Act, protects your warranty from being voided for using third-party products, unless they’re causing any vehicle issue.
Conclusion
Adding an amp is not daunting though the work is intimidating because of the wiring. Don’t fret even if there are humps along the way (pun intended) because once you finish the installation, you’ll learn the tricky way of working with wires.
Now that you know how to install an amp in a car with factory radio, you’ll experience what a joy ride means as you drive downtown and beyond.

Hello! I am Hart, the content writer and editor here at G0HWC. I used to be in the same local radio club with Howe, and he convinced me to join him in spreading my love for the radio with others. With a background in radio studies, I spend every day crafting accurate, easy to read content on various topics related to owning and using radios. I hope that my content can help you confidently venture in your radio journey!